
Custom Ford Capri headliner
The time has come to start thinking about the roof. I had a several tasks to accomplish – good sound deadening system, temperature insulation, and the last, but not less important – the material had to be black and perforated.

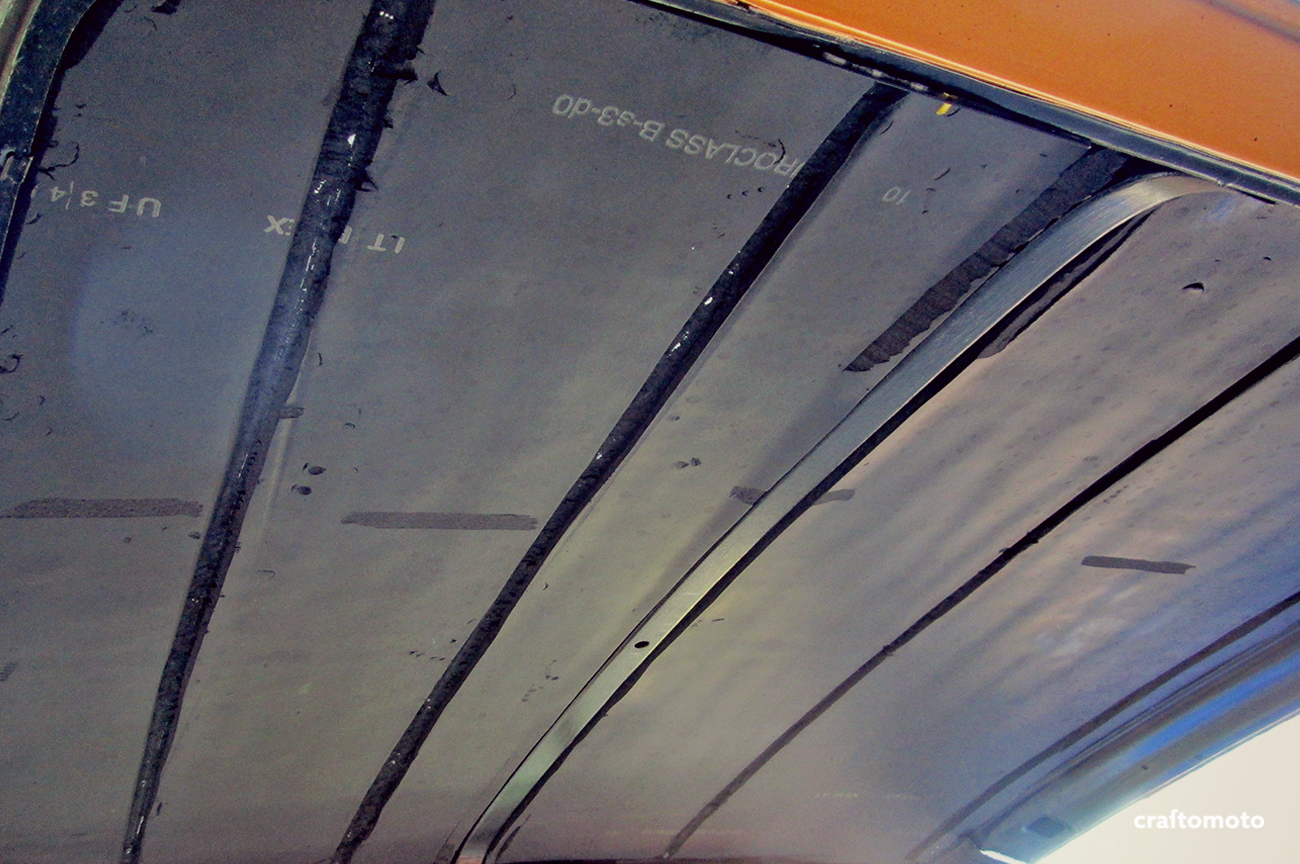
The original insulation.

After the insulation was removed, everything was brush painted.

After the cleaning, I mounted the 3mm thick sound deadening material on the roof. I used the self adhesive aluminum tape to make an airtight seal, just in case there’s smell from the deadening material. To achieve maximum adhesion of the material, I’ve been doing it during the summer heat, so both the roof and the material were quite warm.
I heard horror stories of deadening material letting go during the extremely hot days, so I decided to left the car on the sun for 5 days during the hottest period. The insulation has endured the test, so it was ready for the next step.

The first step was followed by putting 10mm of closed cell foam that is usually used for duct insulation. It’s a good sound and heat insulator, also, the self adhesive side can hold on temperatures more than 100 Celsius, and that is a good thing.
I realized that the ducting insulation gets in the way of roof hanger springs, so I had to make room for them.
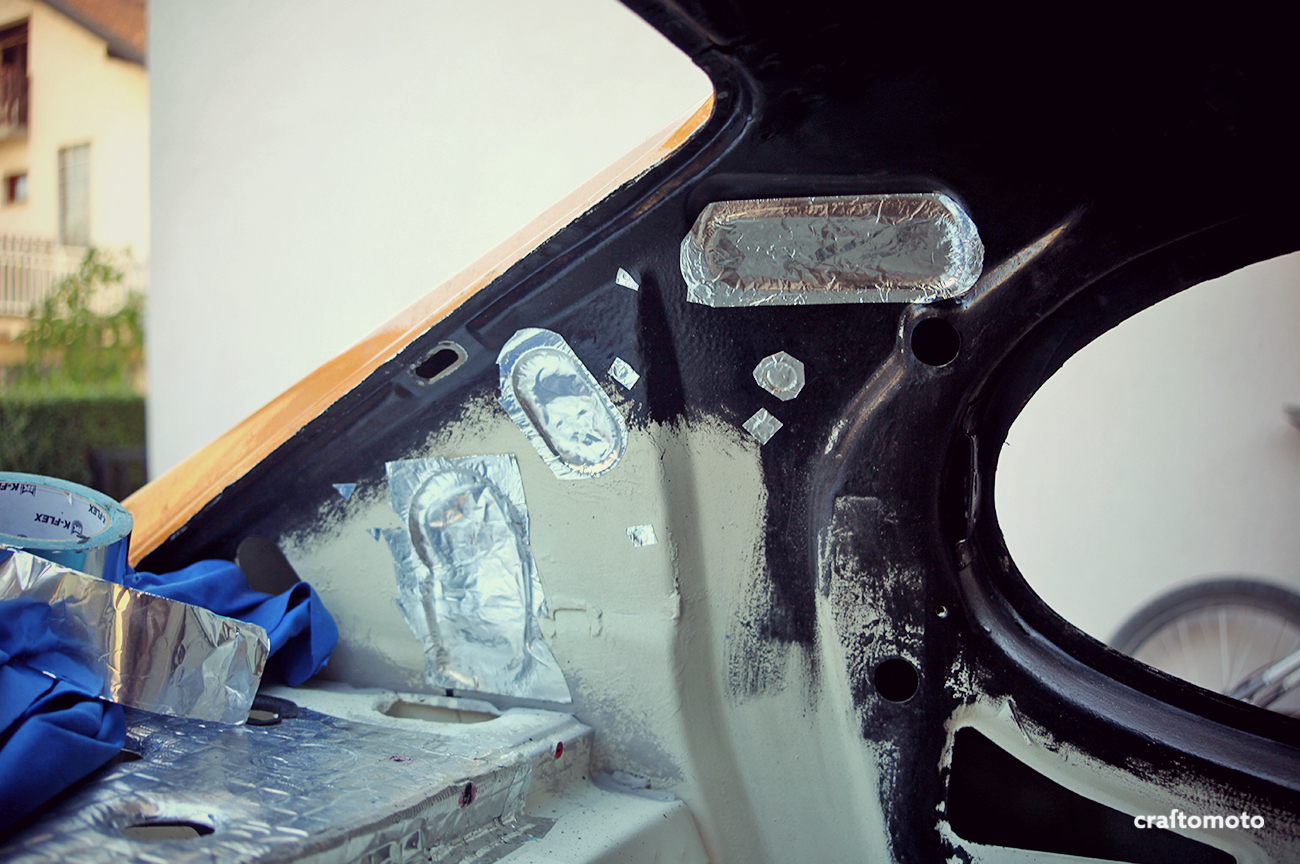
Before putting the side deadening, I covered the holes with the aluminum tape from both sides.

After that, the deadening was placed. Since the headliner material had tiny holes, I needed to darken the sides.

I created the stencil and cut the retex, but that didn’t work quite well. I decided to use artificial leather instead.

The whole interior was redesigned, so I couldn’t use the original trims so I needed to create new ones.

I used this thick plastic to make the trims.

And painted them black.

The forex was cut to size.

It was used to fill the hole of the original mirror mount so there won’t be any surface imperfections when the headliner is installed.

And for the same reason I used the polyurethane glue to fill up the junctions.

There’s quite a lot of cables required, mostly because of the overhead console, bunch of lights and a rear view mirror with a display.

Cabels have been cut to size.

I used this 3M cockpit tape to reduce the possibility of rattle noise, but also for extra protection.

Cables ready to install.

Everyone who ever tried to install Capri roof is probably familiar with this horrible plastic that holds the ends of hanger springs. Usually they fall apart from age. The new, and much stronger set was created.

Never trust the old headliner! I had the original one and when I started measuring the distance between the springs, nothing lined up. The original headliner has stretched over time and the only thing I could to was to take my own measurements directly from the roof, and hope for the best.

Of course I got the black headliner material.

Here you can see the precise and super boring job of marking.

During the sewing I needed to be extra precise, because every imperfection will be visible after stretching.
 Usually when they make headliners, craftsmen use couple of segments and stitch them together. I decided to go with the “no error allowed” method and do it from one big piece.

First I wanted to powder-coat the pilar trims, but at the end the decision was made to upholster them in alcantara end get more luxurious feel.

Because glue, that’s why.

Now there’s a level of luxury added to the interior. I hope 

The mounting started with inserting the roof springs.

Next step was to stretch the roof without glue, just to see if it works.
So far so good. Still need to cut the material around the pillars.

During the mount, I used the door seal to hold the material while the glue drys.

Looks straight enough.

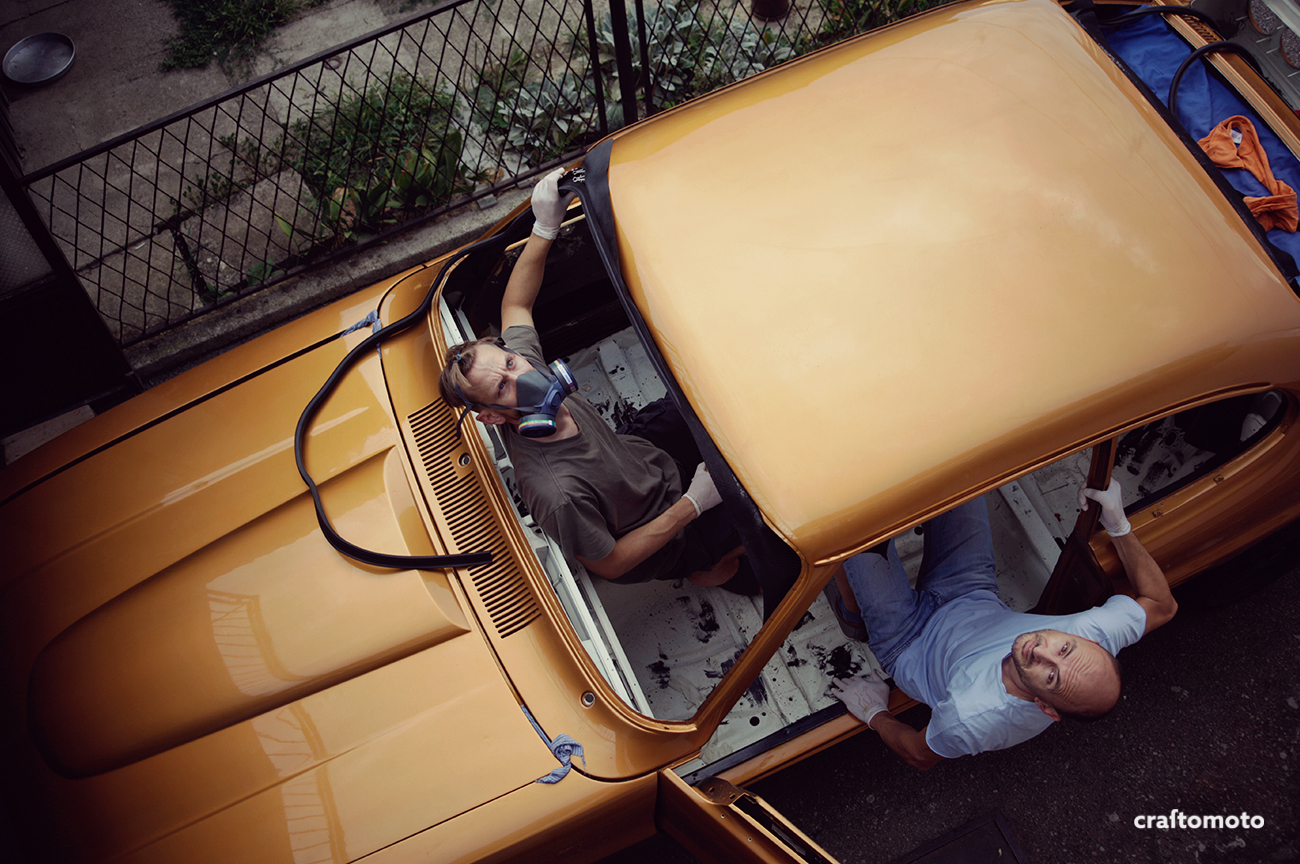
Thanks to Josip who helped with the stretching, the whole procedure was much easier.

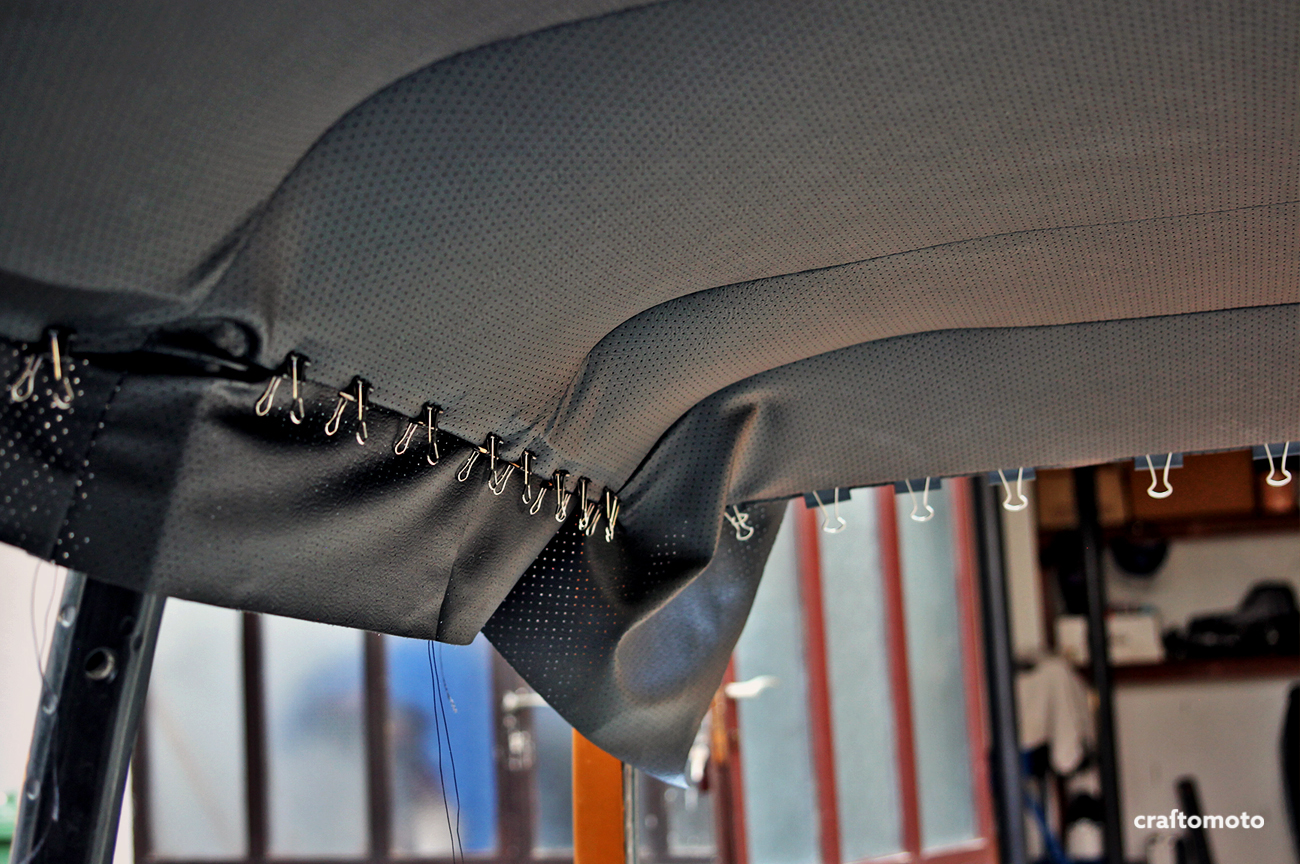
I left a full width of roofing material so there was more than enough.

You can’t have enough paper clamps while stretching and gluing the headliner.
The view from our balcony.

Cleaning after the successful operation.

Here are few shots of a final headliner.


A detail of a trim. Pretty glad how the whole thing turned out.
If you like what you see, you can follow us on Facebook and Instagram


